How small fashion brands can replace photoshoots with AI model photos
By Snaproom · April 18, 2026 · 8 min read
You started your brand because you have great products. But when you look at your product pages next to your competitors, something feels off. Their images look like they came from a professional studio. Yours look like you took them in your bedroom, because you did.
The gap isn't your product. It's the photo.
For years, the only solution was a real photoshoot. Book a photographer ($500–$2,000 a day), hire a model ($200–$800 a day), rent a studio ($300–$800 a day), add editing time on top, and you're looking at $3,000 to $5,000 minimum before you've sold a single unit. For a small brand with 20 SKUs, that math doesn't work.
In 2026, that's no longer the only option. AI model photography has matured to the point where small brands are generating professional on-model images from a single flat-lay photo, in minutes, for a fraction of the cost. This guide explains exactly how to do it, including the parts other guides skip over.
We've spent the last year working with hundreds of independent fashion brands, from one-person Shopify stores to small agencies handling several DTC labels at once. The patterns are consistent. The brands that adopt AI photography early aren't replacing their entire creative process; they're using it to free up budget for the parts that actually move the needle, like paid acquisition and product development. This article walks through what we've learned, what works, and what doesn't.
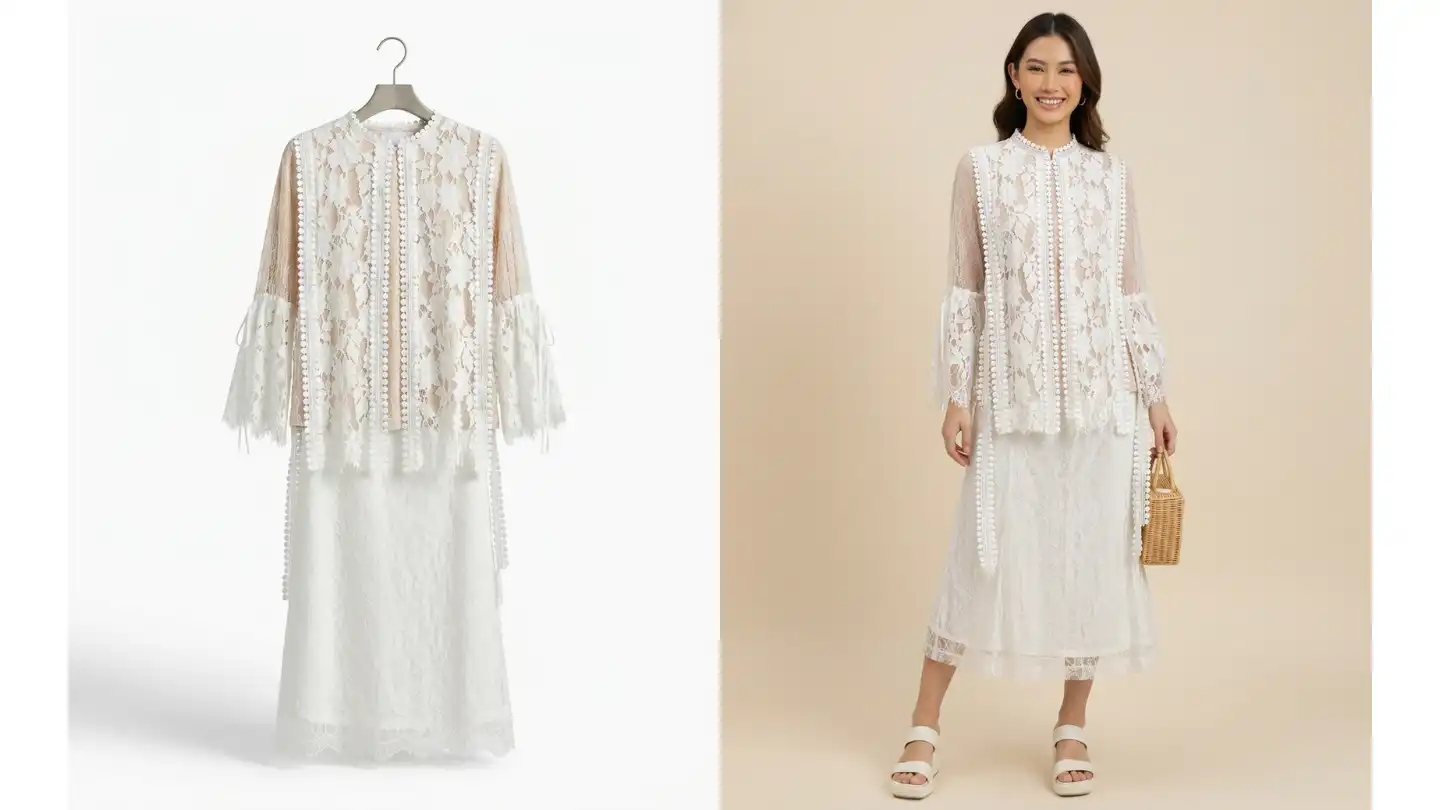
AI fashion model photography takes a photo of your clothing item, a flat lay, a hanger shot, or a mannequin photo, and places it on a photorealistic AI-generated model. The output is an on-model image that looks like it came from a professional photoshoot.
It is not the same as AI image generation tools like Midjourney, where you describe something and an image gets created from scratch. With AI fashion model tools, your actual garment is preserved, the colour, fabric texture, logo, print, and construction details all carry through into the generated image. The AI is placing your real product onto a virtual model, not inventing a new one.
The distinction matters for ecommerce. Your customers need to see your actual product on a body, not an AI's interpretation of it. If a buyer orders a navy linen shirt and what arrives doesn't match the photo, your return rate climbs and so does your customer-service load. Returns at 30% destroy margin in fashion the way nothing else does, so accuracy in your product imagery is not negotiable.
Modern AI fashion model tools work by separating the garment from any background or model in the source image, then compositing it onto a generated body that matches the body type, pose, and lighting you specify. The garment itself is treated as a fixed reference. Wrinkles, hems, prints, and labels are preserved. The model, the studio, the lighting, and the pose are the variables. This is fundamentally different from a generic image generator, and it's the reason a properly built tool is fit for ecommerce while a general-purpose one is not.
Before you generate anything, your input photo matters enormously. The AI can only work with what you give it. A blurry, wrinkled, poorly lit flat lay will produce a mediocre on-model image no matter how good the tool is.
The minimum viable product photo:
You don't need a professional camera. A modern smartphone in good light is enough. What you do need is patience with the preparation. Spend 10 minutes steaming and laying the garment flat before you photograph it, and you'll get significantly better AI outputs. The single biggest mistake we see is brands shooting wrinkled garments thinking the AI will smooth them out. It won't, wrinkles get carried into the final image and look amateurish.
If you're shooting a darker garment, place a sheet of white foam board on either side of the item to bounce light back into the fabric. Cheap black-on-black photography is the second most common reason AI outputs come out flat, there isn't enough information in the source image for the tool to read texture and shape. Spending fifteen dollars on foam board pays for itself in better outputs within a single product cycle.
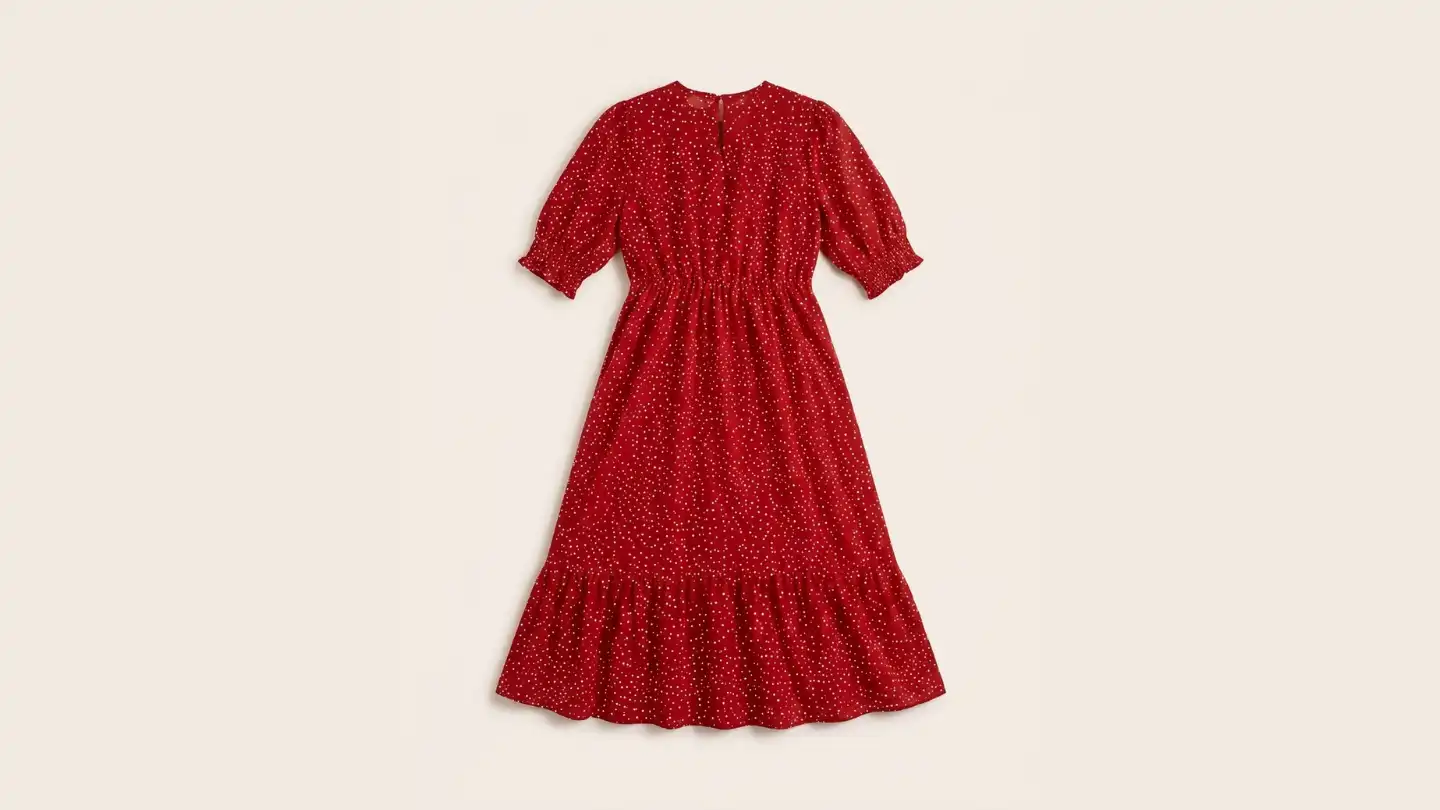
Lay the item flat on a clean white surface. Smooth every wrinkle. If it's a top, stuff it lightly with tissue paper to give it shape. Photograph from directly above for a flat lay, or hang it on a clear hanger against a white wall for a hanger shot. Take the photo in daylight near a window, not in artificial indoor light, which tends to add a yellow cast.
Upload your photo to an AI fashion photography platform. At this step, most tools will ask you to confirm the clothing type, top, bottom, dress, outerwear. Get this right because the AI uses it to understand how the garment should drape on the model.
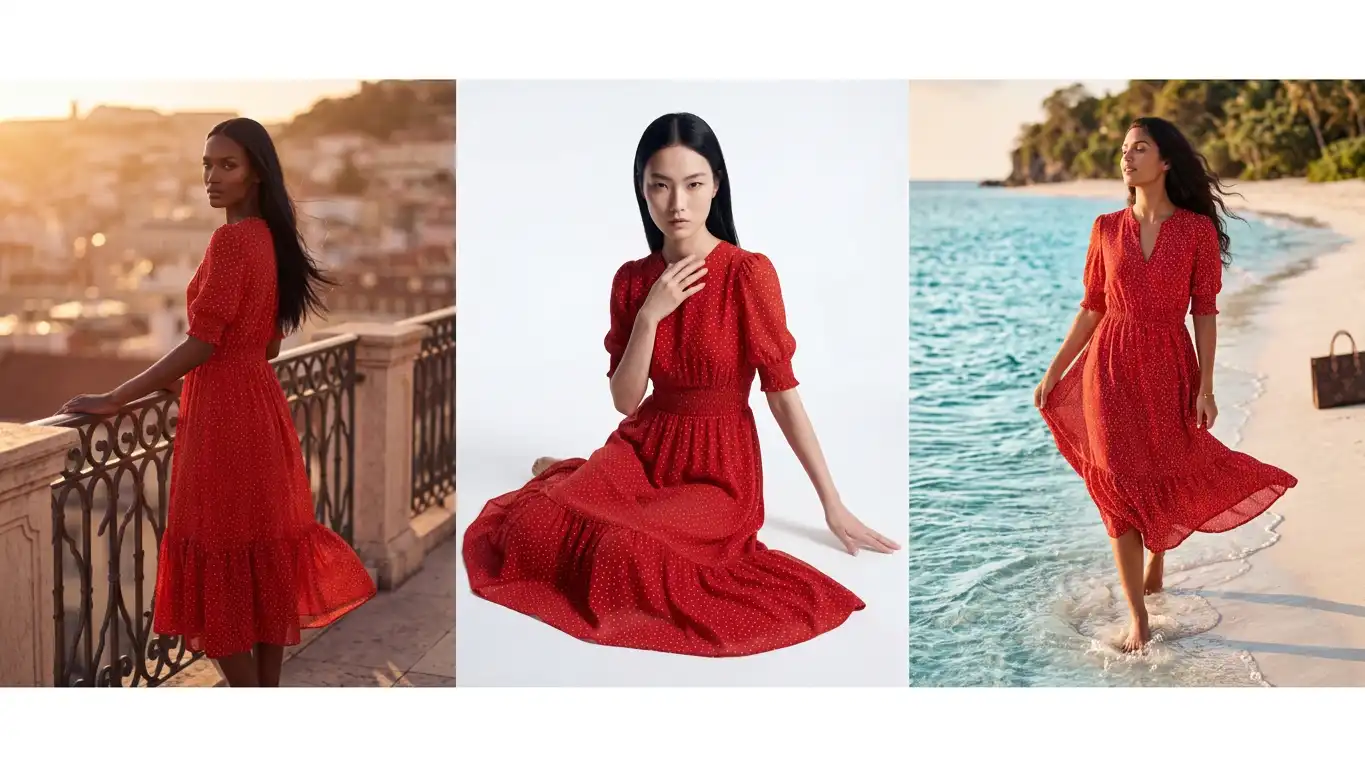
Choose a model that reflects your target customer. Consider ethnicity, body type, and gender. The best tools give you a meaningful range here. If your brand sells to a specific demographic, petite women, plus-size shoppers, male streetwear buyers, choose accordingly. The model you pick signals to your customer who the brand is for.
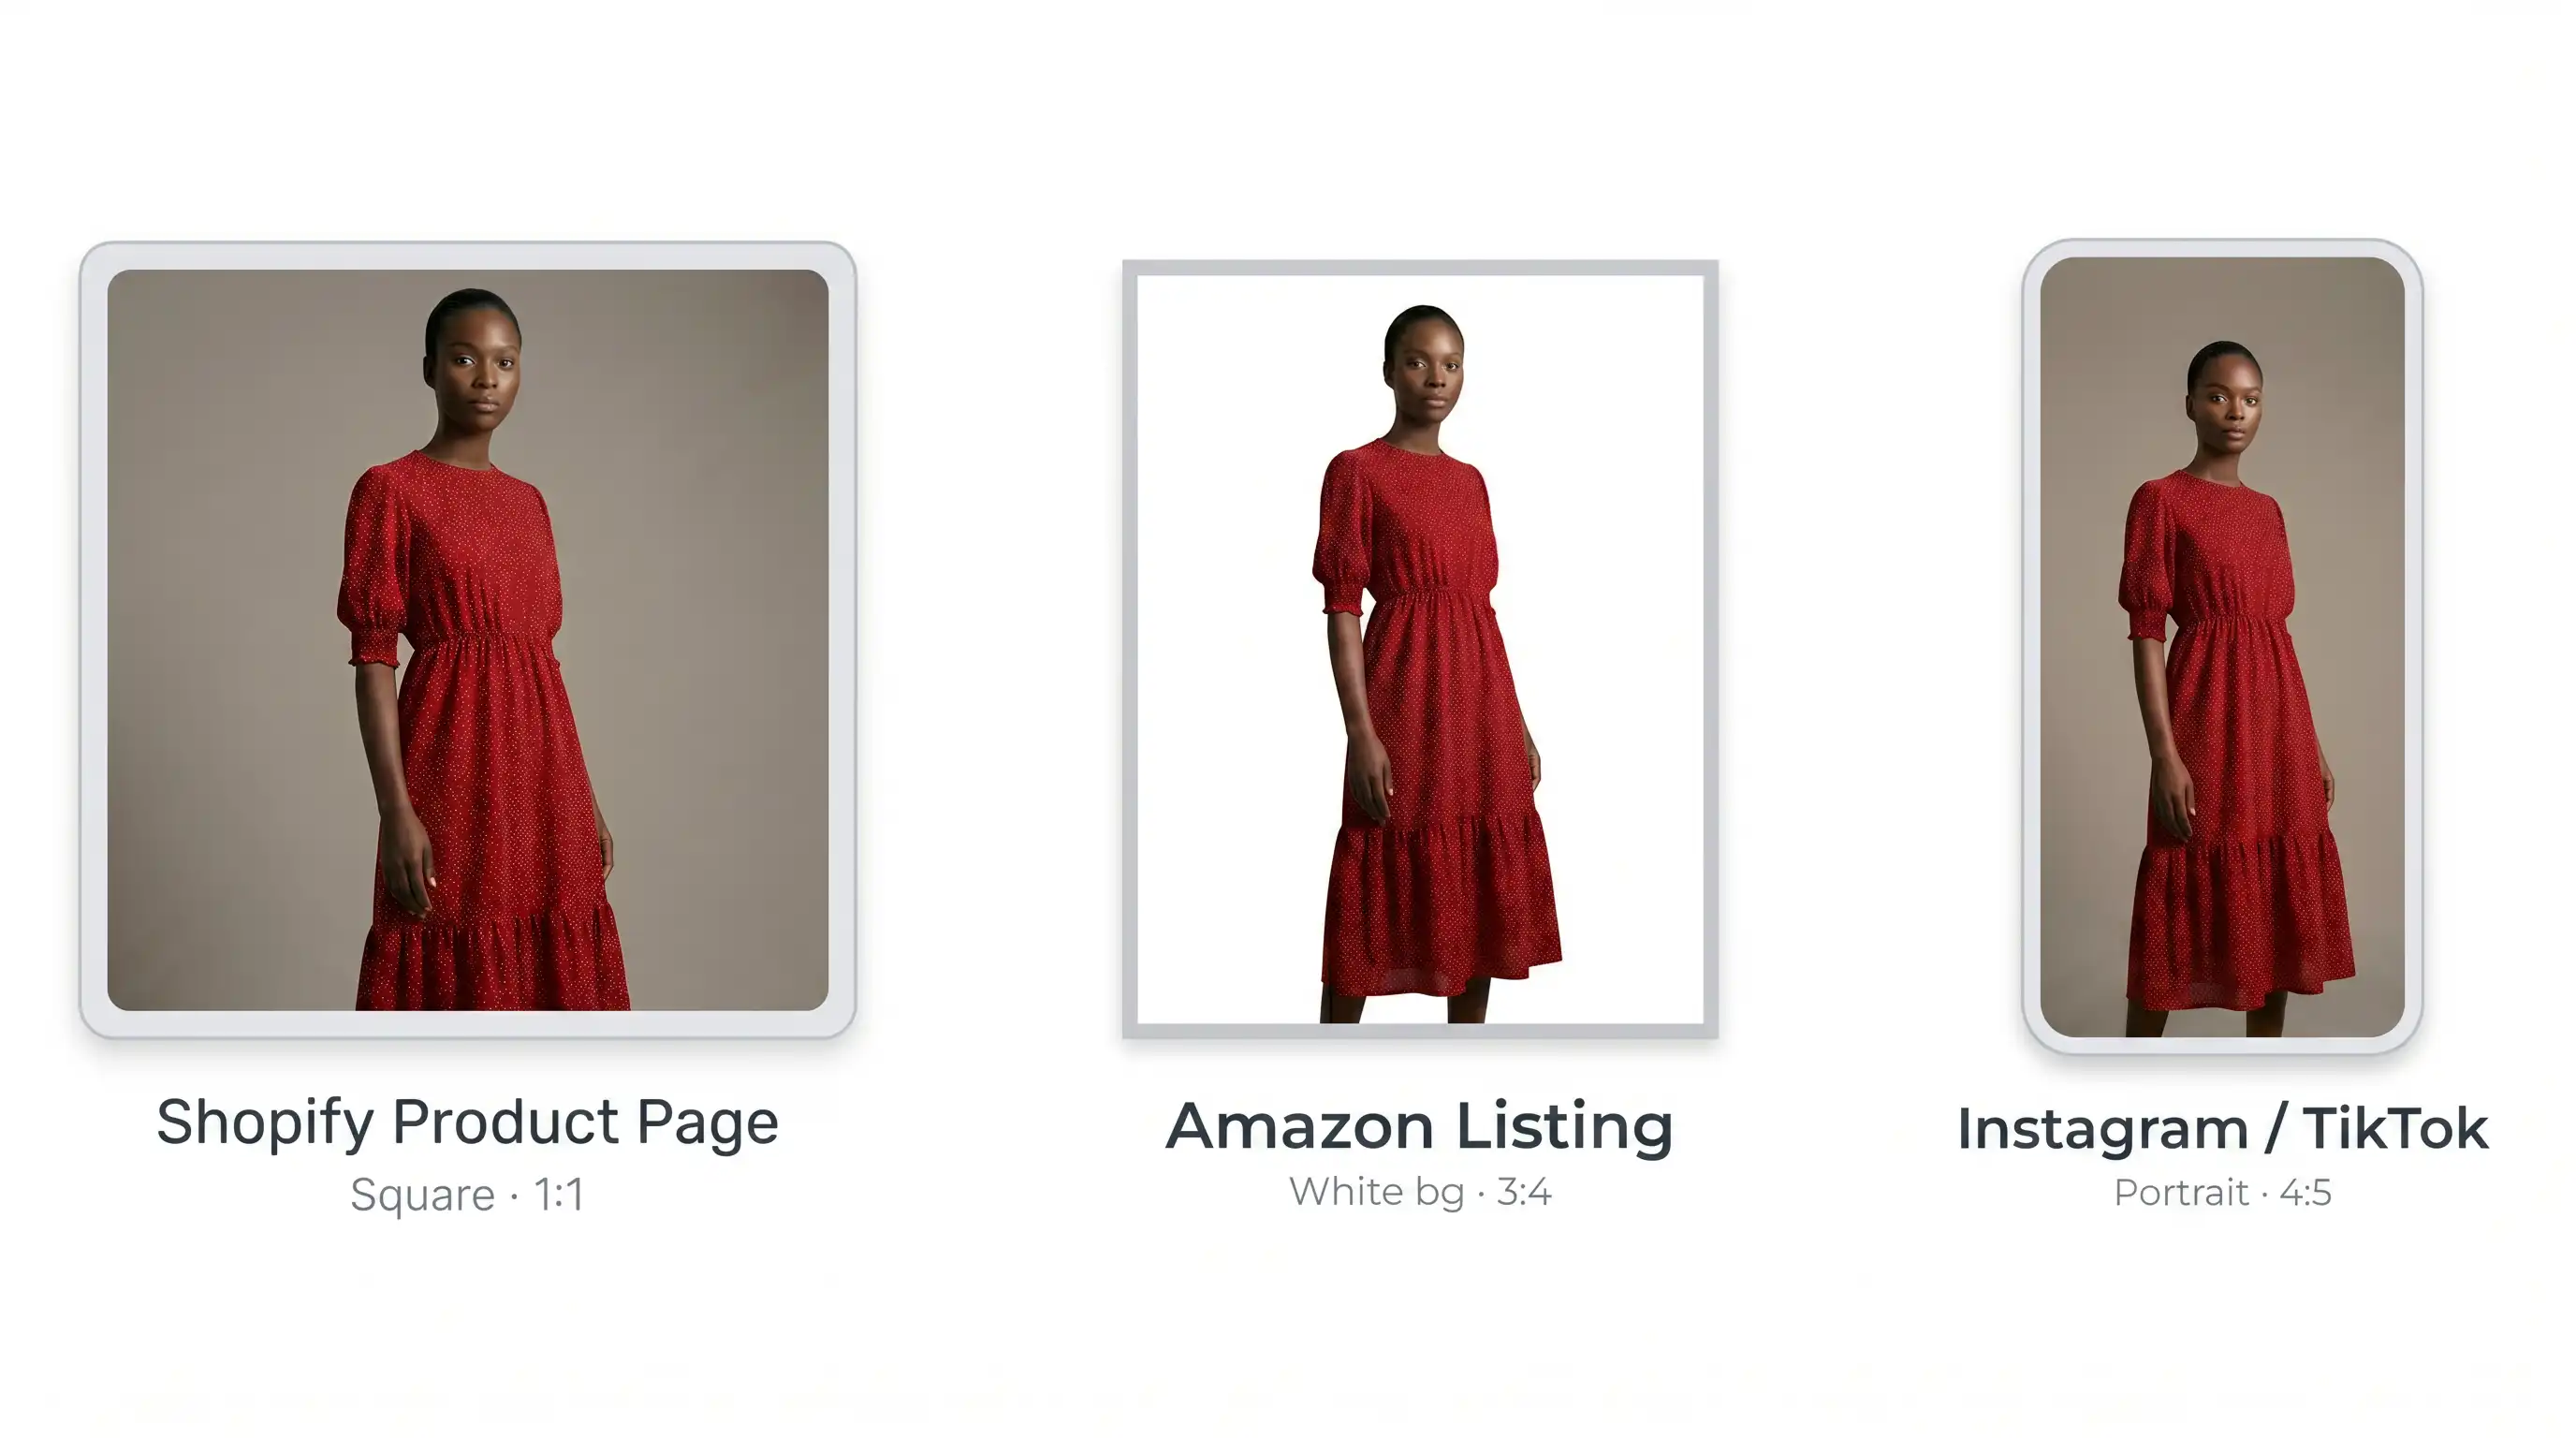
For ecommerce product pages, a clean studio background (white, grey, or light neutral) is almost always the right choice. It matches marketplace requirements for Amazon and Shopify, keeps the focus on the garment, and looks professional at thumbnail size. Save lifestyle backgrounds for social content and ads.
Most tools generate 3–5 variations. Review them critically:
Reject anything that misrepresents the product. Your return rate will tell you if customers are getting something different from what they expected.
Most AI fashion photography tools output at resolutions suitable for ecommerce, typically 1024px to 2048px. For Shopify product pages, 2048px square is ideal. For Amazon, the main image requires a white background with the garment filling at least 85% of the frame.
If the output needs minor cleanup, a smudge in the background, a slightly oddly placed hand, most images can be touched up in two minutes with a free tool, or run through a smart retouch tool that handles the cleanup automatically. Don't skip this step on hero images or main product shots; small visual flaws disproportionately erode trust.
Here is what a small brand with 20 clothing SKUs would typically spend:
| Traditional photoshoot | AI model photography | |
|---|---|---|
| Photographer | $1,500 | Not needed |
| Model | $600 | Not needed |
| Studio rental | $600 | Not needed |
| Styling and prep | $300 | Not needed |
| Editing (60 images) | $600 | Included |
| Total for 20 SKUs | ~$3,600 | $12–$60 |
| Time to complete | 2–3 weeks | 2–3 hours |
The cost reduction is real. So is the speed, from weeks of scheduling to hours of work. For seasonal brands with tight launch windows, this changes what's possible. You can shoot, generate, and publish a 30-piece collection in a single afternoon instead of waiting three weeks for a studio booking.
There's also a less-discussed cost: the cost of being wrong. With a traditional shoot, if your initial creative direction doesn't resonate with customers, you've spent thousands and have to either live with it for the season or shoot again. With AI photography, you can iterate. Generate three different model types for the same garment, A/B test them on your product page for a week, and let conversion data tell you which version of your customer responds best.
Every guide in this space oversells the technology. Here is an honest breakdown.
AI handles these well:
AI struggles with these:
For sheer or complex garments, virtual try-on with a controlled model photo as the base can sometimes produce better results. Test before committing.
Another honest limitation: AI struggles with very specific styling. If your brand identity depends on a particular knot in a scarf, a precise way of cuffing a sleeve, or an unusual layering decision, you'll need to either accept some variance or do a hybrid workflow, generate the base on-model image with AI, then handle the styled hero shot the traditional way. For most product-page imagery, the AI output is more than good enough. For your campaign hero, you may still want a real photographer.
And finally: the AI doesn't know your brand voice. It will produce technically correct images, but the editorial sensibility, the choice of pose, expression, framing that defines your brand's visual identity, is still on you. Don't outsource creative direction to the tool. Pick your model, your background, and your styling intentionally, and the outputs will look like your brand. Skip those choices and the outputs will look generic.
Use a clean studio background. Generate at least 3 angles if the tool supports it, front, back, and a closer detail shot. The first image is your conversion driver; make it the clearest, most flattering view of the garment.
Here you can use lifestyle backgrounds and more editorial poses. AI tools that generate videos from your model images are particularly useful for Reels and TikTok, a 3–5 second clip of a model wearing your product performs significantly better than a static image in social feeds.
Follow Amazon's image requirements strictly. Main image must be on a white background, garment must fill at least 85% of the frame. AI-generated model photos meet these requirements as long as the output is clean.
For email hero images and paid social ads, you need variety, and you need it fast. Generate four to six variations per campaign and rotate them weekly. AI photography removes the bottleneck that used to force brands to reuse the same three images for an entire season. Chat-to-edit tools let you tweak background colours, add or remove props, and adjust lighting on the fly without re-generating from scratch.
Getting good images is half the job. The other half is using them to understand what actually converts.
After your AI photos are live, watch two numbers: add-to-cart rate and return rate. If your add-to-cart rate improves but your return rate goes up, the images are making the product look better than it is. If both improve, you've found a workflow that works.
Test one product page at a time. Replace the photos, give it two to three weeks of traffic, and compare. Don't change anything else on the page during that period or you won't know what moved the needle.
It's also worth checking your photo set against the basics of merchandising. Every product page should have at least one full-body shot showing how the garment hangs, one detail shot showing fabric and construction, and ideally one back view. Brands that ship only the front-on hero see higher return rates because customers can't visualize fit. AI lets you generate a complete photo set per product cheaply enough that there's no excuse for a thin product page anymore.
Once you have a workflow you trust, automate the parts you can. Most brands end up with a small library of model selections and background presets that match their brand. Save those as templates and your time-per-product drops to under two minutes. The brands that win with this technology are the ones that treat it as part of their operations, not as a one-off experiment.
Most AI fashion photography tools offer a free trial with a small number of credits. Use the free trial on your three best-selling products first, the ones with the most existing traffic. That way you can evaluate quality on real products that already have performance data to compare against.
If the output quality is acceptable for those three products, you have your answer. Roll it out to your full catalogue.
One last piece of advice: don't try to perfect this before launching. The brands that benefit most from AI photography are the ones who get something workable live within a week and iterate from there. The competitive advantage isn't the technology itself, by 2027, every clothing brand on Shopify will be using something like this. The advantage is in the speed of your learning loop. Brands that test, measure, and adjust their imagery monthly will outperform brands that batch a single shoot per season, regardless of how that shoot was produced.
If you're a small brand with limited budget, this is one of the few real levers you can pull this year that costs almost nothing and meaningfully improves how your products are perceived. The technology has caught up. The cost has come down. The only thing left is to try it on your own products and see what happens.
If you're starting from zero, here is the plan we'd give a new brand owner this week. It assumes you have a Shopify store, twenty or so products live, and no existing on-model imagery, just flat-lays or hanger shots taken on your phone.
Day one: pick the three products with the most product-page traffic over the last 90 days. These are your test set. Re-photograph each one carefully, steam the garment, lay it flat on a clean surface, shoot in good window light. Take the time to get these source photos right; everything downstream depends on them. Don't rush this step, even though it feels like the boring part. The brands that get worse results from AI photography almost always have bad source images.
Day two: generate model photos for those three products on a free trial of an AI fashion photography tool. Generate three to four model variants per product so you have something to choose from. Pick the strongest variant for each product based on how natural the fit looks and how well the garment colour and texture come through. Don't worry about being perfect on this first pass, pick the best of what you have and move on.
Day three: replace the existing primary product image on each of those three product pages. Keep your existing flat-lays as secondary images further down the gallery; that combination of on-model hero plus detail flat-lays performs well on Shopify. Don't change the price, the copy, or anything else on those pages, you want a clean before-and-after for the next step.
Days four through fourteen: leave it alone. Watch your add-to-cart rate, conversion rate, and return rate on those three products versus the rest of your catalogue as a control. After two weeks of normal traffic you'll have enough data to make a confident decision. If the numbers move in your favour, roll out across your full catalogue. If they don't, dig into why, usually the source photos need more work, or the model selection didn't match your customer demographic.
That's the entire on-ramp. No long deliberation, no big upfront investment, no perfect launch. Two weeks from today you'll know whether AI fashion photography belongs in your operations or not. For most small brands selling clothing online in 2026, the answer turns out to be yes, and the brands that find that out earliest get the longest runway to compound the advantage.
AI fashion model photography typically costs $0.20–$1.00 per generated image, compared to $3,000–$5,000 for a traditional photoshoot covering 20 SKUs. Most platforms offer free trials.
Yes. AI-generated model photos meet Shopify and Amazon image requirements as long as the output is clean and high-resolution. For Amazon main images, ensure the background is white and the garment fills at least 85% of the frame.
AI model photography works best on solid colour garments, simple prints, outerwear, and structured pieces. Sheer fabrics, sequins, and garments with very small text or intricate embroidery are more challenging and should be tested carefully.
No. A modern smartphone in good natural light is sufficient. The most important factors are a clean white background, wrinkle-free garment, and good lighting, not the camera.
Upload a clothing photo and get a professional model image in under 30 seconds.
Try Snaproom Free →Turn one product image into a complete studio-grade AI model photo set.
Learn more →Place your garment on diverse AI models for realistic size and style representation.
Learn more →Generate front, back, side, and detail views from a single clothing image.
Learn more →